Showing posts with label purple. Show all posts

Monday, 7 October 2013

NOTW: Pop! Kettle. Black?

Well, hellooooooooooo lovelies :D

I'm so excited about today's post, so I'll just get to it. I DID AN AWESOME GRADIENT!!! *unashamedly blows own trumpet* Lookie, lookie:

*yay* :D
*Pardon the clean-up: see below for why
it's not as good as usual!

Isn't it amazing?! After my failed summer gradient here, I vowed to try a makeup-sponge gradient again with a white base coat. It took me many weeks to track down Sinful Colors Snow Me White, and when I finally saw it in Boots, I nabbed it immediately, came home, and set to work. I'd been obsessing over a purple/orange gradient, and I think I may have finally got that out of my system ;-)

The polishes I used for this gradient were:
  • Sinful Colors Snow Me White (base)
  • KIKO #315 (dark purple)
  • Rimmel How Do You Lilac It? (lilac)
  • Catrice Salmon and Garfunkel (peachy orange)
  • Rimmel Pop! (bright orange)

I then took a kitchen sponge and dabbed more of the KIKO polish over the top of the gradient to tie the design together. This definitely made the mani! 

A work in progress...
... now with added faux-splatter!

On a brief side note, please know that makeup-sponge gradients are not for the faint-hearted! The clean-up required is pretty horrific! Look:


It's true that splatters are messier, but my cuticles looked red raw by the time I'd scrubbed that polish off with acetone! Next time I'll definitely use Vaseline, just like I recommended for my splatter mani here. 


Sooooo what do you think of this mani? I think I was definitely channeling autumn/Halloween with this one! What strange colour combinations have you tried for your own gradients? Lemme know in the comments!

'Til next time, curlettes :-)

- Skye x


Monday, 23 September 2013

NOTW: Criss-crossed At Ease

Hello my lovelies! How are you today? :-)

In line with my summer catch-up posts, I'd like to share with you a new striping tape mani! This had been on my mind for a long time, so I'm glad I finally got to try it. Let's take a look:

Look, it's me! :P (indirect sunlight)
Direct sunlight :-) :-)

Soooooo... what do you think?! I just loved this mani - especially the juxtaposition of neutral and bright, creme and shimmer (Rimmel At Ease vs Catrice Heavy Metal-lilac) :-) I originally planned to do this to all of my fingers, but the striping tape was actually a little tricky to use, so I decided to just criss-cross three fingers (incl. my thumb). I think it actually worked better this way! I bet this mani would be great for work if you had time to do all your fingers :-)

Of course, no post is complete without a look at the base colour - Catrice Heavy Metal-lilac:

Shimmery, shimmery goodness *.*
Indirect light :-)


You've already seen this colour on this post, and also on this post, but I have STILL failed to do a full post on the polish. I will once again reiterate how awesome it is - it's a FAVOURITE of mine, and I promise I'll do a proper post on it one day. I love, love, love it, and you should all own it.


Despite this mani being a summer mani, it has a very autumnal feel. I think I'm straddling both seasons right now ;-) I really do love this combination of nude (my new favourite tone!) and bright, and I definitely think I'll try it again - do you have any colour requests? Help me out by leaving a comment with your ideas! :D

'Til next time, curlettes :-)

- Skye x

Monday, 2 September 2013

NOTW: Splattered irises

Hello my lovelies! Long time, no see!

I'm so sorry that I've been AWOL lately. So much has been going on that I've barely had time to eat, sleep and breathe, let alone update my lovely followers on my latest mani experiments!


A quick(ish) summary before we start, just so you know I'm not joking (polish stuff starts after the bullets end):
  • Wrist is still (still?!) causing me trouble from my Scotland trip three/four months back, making me a sad, sad panda - hospital appt. for scary nerve tests now pending to see what on EARTH I did to it!
  • Busiest week at work EVERRRRR - an entire month's worth of work in a week from a new client!
  • Did I say new client? I've had about four of those over the past month!
  • Banking issues - banks gave me free money, which I was honest about, and they took forever to sort things out (kind deeds... unpunished)
  • Business accounting and tax returns - 'nuff said
  • Started a legal secretaries course for work which is eating into my free time some
  • Parents away on holiday so I'm house-sitting (and apparently babysitting my grown-up toddler brother; he's 20 years old, but disgusting - I found toenail clippings on kitchen worktops the other day - yuck)
  • Impromptu weekend trip with Chemistry Guy to Edinburgh for the city's famous Fringe Festival - the biggest arts festival in the world :)
  • Mahoosive 13k-word proofreading job that took about double the time I thought it would WHILST I WAS ON HOLIDAY :(
  • I GOT A JOB IN AUSTRIA!!!! I was on the waiting list for a part-time teaching job in the best country in the world, and got notified last week that I'm being slingshotted out there in February for a few months - lots of preparations now underway to get that sorted (incl. immigration, police checks, banking and accommodation issues). Interesting side note: YAY European polish :D
  • General exhaustion because all of the above was squeezed into just a couple of weeks


So you see: I'm not kidding! Crazy times, crazy times! But let me show you something else crazy... my FIRST EVER SPLATTER MANI YO!

Left hand ^^
Right hand *basks in awesomeness*


OK, I'm not gonna lie, this mani was messy as... but sooooooooo awesome. I didn't wanna take it off; it may just be one of my favourite ever manis EVER! It's so spring/summer/flowers/purple and the shimmery purple polish gave it so much depth! I was just thrilled to bits that my random colour choices (incl. an untried) and splattering turned out so lovely :) :) I can't believe it took me this long to finally try the technique out *beams with pride*

My NOTW totally looks like... IRISES! :)

I'm also kind of loving that my NOTW totally looks like irises! This was a total fluke, but after a couple of days I realised what my fingers looked like. If I'm honest, this only made me love the mani more; irises are pretty and smell lovely :) 


The polishes I used for my splattering of awesomeness were:
  • Collection 2000 (Hot Looks) Lemon Soda (base)
  • Barry M Prickly Pear (lilac)
  • Catrice Heavy Metal-lilac (purple shimmer)


Now for a quick word on the mess: Splatter manis ARE messy, however, with the right preparation, you can avoid a lot of the headaches that come about as a result: 
Messy fun!
  1. Lay down some newspaper/old sheets before you start to avoid accidentally splattering (or dripping!) polish all over your best dinner chairs/nice wooden dresser/carpet, depending on how messy you are. Prevention is WAY better than cure on this one!
  2. Prep. your fingers using Vaseline; if you apply some vaseline right the way around your nail and on the pad of your finger (incl. under the nail), extending down to your first knuckle, you'll be covered for any stray splats. This will allow you to grab a Q-tip/cotton bud after you're done splatting and just swipe away the messy polish like it wasn't ever there. Let me assure you that this is easier than taping and far easier than forgetting altogether; I accidentally did the wrong finger on my right hand (lol yes, go back and check the photos) and clean-up was a real PITA!
  3. Practice on the paper first to get a feel for how that specific polish is going to move inside that specific straw. You might need to experiment a little; I ended up chopping my straws much shorter to get a good splatter.


Finally, as always, I'd like to share with you the base coat for this mani: Collection 2000 (Hot Looks) Lemon Soda!

Poor wrist, still in a splinty thingy :/

This is what I'd describe as a butter yellow that looks really quite vibrant in the sunshine (as you saw in the photo of the splatter mani above). The formula was pretty good, as I recall, but not perfect - Hot Looks tend to get gloopier over time. I think this might be a bottle design flaw; perhaps they don't create enough of a seal between the bottle and the lid? Can't fault the colour though, and for the price it's worth it!


Sooooooooo :) What do you think?! I've been waiting to share this mani with you all for weeks and weeks, and I'm so glad the time finally arrived! I can't wait to try more splatter manis. What crazy colour combos would you like to see? Hit me up in the comments and let me know!

'Til next time, curlettes :-)

- Skye x


Monday, 22 July 2013

NOTW: Barry goes tribal

Hello, my lovelies! How's it going?

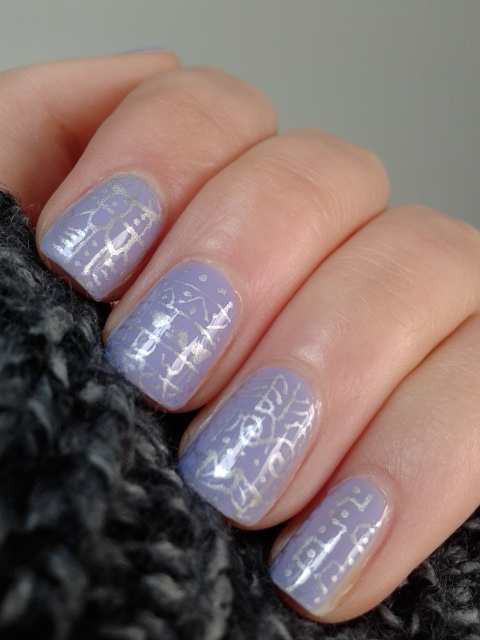
Today I bring you a relatively short and sweet post - my latest foray into the world of tribal manis and my first ever skittle mani! The last time I tried this, it went horribly wrong, so I ended up doing something else altogether... but this time, armed with my new silver Barry M nail art pen, I was in a position to create something beautiful! Let's take a look at what I came up with: 


Tribal mani!!!

:-) :-) *pride* Here's some close-ups of the designs:

Thumb shot
*Squeeeeeeeeeeeeeee I did it!!!!!!!!*

Isn't it awesome!? Now, I'm not a very creative person, so I totally ripped off paid homage to Debbie Crumpet on this one, whose patterns I all but reproduced line for line (bar the odd few dots here and there). Check out her AMAZEBALLS tribal post here and you'll see what I mean! They say that imitation is the sincerest form of flattery, so I hope that she's flattered (and not horrified by my attempt to art) - I take absolutely no credit for this creation at all :-) 

Finally, as always, let me show you the beautiful base colour for this mani - Barry M Gelly Hi-Shine Prickly Pear: 


This is actually the second time I've worn this polish, but the first time was when I went to Scotland for my little holiday and I forgot to get a pic amid all the packing and travelling. This may be one of my fav new polishes. After loving Barry M's Pomegranate Gelly, I knew I had to try some more in the future, and when I saw this in store I fell in love! I'd describe the colour as both a warm blue and a cool lilac all in one - the colour is absolutely unique in my collection and has a wicked natural shine, even without a TC. It's delicate and will probably suit absolutely everyone, so go buy it immediately! You need this polish in your collections.


And so my Barry M nail art pen adventure continues! What else should I draw? Hit me up in the comments!

'Til next time, curlettes :-)


- Skye x


Monday, 24 June 2013

NOTW: KBShimmer The Square

Hi my lovelies! Welcome back to where the magic happens ^^

Today I'd like to share a KBShimmer polish with you which is one of the most unique polishes in my collection. I recently acquired it from Debbie Crumpet in her blog sale, and I have to say, it's a real winner! Introducing KBShimmer The Square from the now-discontinued Clique Collection:

Direct sunlight... it glows!!!!

Indirect sunlight (ignore the splint...)
As the name suggests, this is a square glitter polish! The glitters (lavender, blue, green, gold and white) sit in a purple jelly base, and the formula is pretty good, although I did have to fish for larger squares. This could be down to the polish sitting unused for so long, or even the fact that I'm not used to glitter polish with such large glitters... or it could just be that this is one of Christy's older polishes, and so she was still tweaking her base formula so that glitters were plentiful and unsinkable :-) Either way, this didn't bother me too much; as a jelly, the polish builds really nicely, and I have a feeling that my poor technique has more than a little to do with it! Also worth mentioning - the square glitters stayed flat! Beautiful. My swatches unfortunately don't do this gorgeous polish justice, but you can find an even better swatch here at Crystal's Crazy Combos! Do check out her post because her photos really are something.

Finally, I'd like to show you the base colour for this mani, the stunning Catrice Heavy Metal-lilac:

That's right! Oooooh and ahhhhh :D
This is a really wonderful polish that was sent to me as a gift some months ago by the lovely Cristina, who has my polish tastes absolutely pegged! This is just one coat of the polish, which is a one-coater and also good for stamping :-) Heavy Metal-lilac is a really rich purple which truly glows from within. Even my guy pals like it! It actually changes in the light and is so multifaceted that I'm planning to give it a post all to itself - just as soon as I edit down the 100 or so photos I took when I wore it on its own! This is definite a favourite polish of mine and I'm thrilled to have it in my collection :-) Thank you, Cristina!


What's the most unusual polish in your collection? Let me know in the comments!

'Til next time, curlettes :-)

- Skye x


Monday, 1 April 2013

NOTW: Snow-day Snowfall

Hello dearies! Welcome back to Curly Polish!

Today I have another snowy Snowfall mani to share with you, since the UK was hit (a few weeks ago now) with a freak snowstorm. Snow is not common in the south of England, because it is normally too warm... but today my mani matched the weather *nerdy squeeeee*!

My sincerest apologies in advance for the photos for this post; I had a massive fit of the shakes (too little food and sleep!) when I took these photos, and despite having taken about twenty, NONE of them were in focus, which sucks because this was beyond gorgeous IRL :-( 

This being said, I did the mani and took the photos...

... so let's take a look anyway :-)

The best pic I had... and it's still blurry *le sigh*

This is one thickish coat of Sonnetarium Snowfall over a purple gradient created with Collection 2000 Purple Rain (base colour) and Rimmel Black Cherries (gradient), which gave this mani an awesome wintry depth ^^ I did need to dab a little in places to get a nice even distribution of snowflakes, but that's mainly because I decided I wanted a saturated snowstorm look. I think the mani worked really well and I couldn't stop staring at my fingers, but the mani didn't last long...

Indeed, for this mani, I used the Essence All Aboard glue base coat (which, btw, has everything that pva glue doesn't!), and then I was stupid enough to wash my hands between coats cos I popped to the loo, and the base coat melted... so I had to do ANOTHER layer of the glue basecoat on top, and then my mani sorta popped off my nails a bit sooner than planned :/

This post also sucks slightly since I forgot to include a swatch of the base colour (I'm sooooo sorry). I think that there is a decent-ish swatch in this post, however, so all is not lost :-) ! What I can show you is a work-in-progress shot; this is my pre-clean-up gradient pic, which truly does neither polish justice, but will have to do:

The perfect base for Sonnetarium Snowfall...

This was a highly successful mani, despite the photos, and despite the fact that it was a short-lived success. I also now know to set aside a decent amount of time when doing a glitter mani with the glue base coat - hand-washing ruins glue!

What have you layered Snowfall with? Holla back 'cos I wanna know!


'Til next time, curlettes! :-)

Keep smiling!

- Skye x


Monday, 18 March 2013

NOTW: Sugar Plum Faerie drip mani

Why hello, my lovelies! I've picked up a lot of new followers since I started my WAUF feature, and I'd like to thank all of you for tagging along :-) I hope you enjoy my blog! 

Today I have to show you a mani featuring one of my new KBShimmers: Sugar Plum Faerie ^^ This is of course not a new polish, but it's been sitting untried for a loooooong time and took a mammoth two months to reach me, so this is a BIG DEAL! 

Firstly, let me show you my attempted art for this week - a drip mani (oh yeaaaaah, crossed another technique off my list). Check it:

... pease pudding cold.
Pease pudding hot...


I loved this mani but found it really hard to capture on camera :/ It sorta looked like a quirky Xmas pudding to me, what with the glitter base and shimmery drips (Rimmel Black Cherries) :-) Om nom nom nom nom. 

WOOHOO! Short post today (I'm getting better - see!) ^^ Finally, I will of course show you the base colour - the gorgeous Sugar Plum Faerie:

... I know right?! (colour-accurate)

I think this may be my new favourite polish. The glitter colour combo is wicked and the polish applied like a total dream; it's the first KBShimmer I've owned with a formula that can only be described as utter perfection - and my others really have a great formula, so that's saying something! Christy got this one bang on!

*prideful parting shot* (sorry about the colour distortion!)

What do you think of this mani? I always thought that it would be difficult to do a drip mani but it was surprisingly simple - all it took was a marker pen lid (aka my dotting tool) and a steady-ish hand to join the dots up :-) I will DEFINITELY be trying this again!

What colours would you choose for a drip mani? Have you ever done an adventurous polka dot/striped drip mani? Those still look hella scary to me! 

Thanks for reading and 'til next time, curlettes ^^

- Skye x

Monday, 25 February 2013

NOTW: Funky yet delicate stamping

Hello my lovelies :-)

WOW and welcome to all my new followers!!!! I was lucky enough to serendipitously be given not one but TWO shout-outs over FB this past week, meaning that I've gained a whole ton of new readers. Welcome, welcome, welcome :-) :-)

Warning: picture-heavy nail-p*rn post!

Today I'd like to show you a mani I'm really proud of - my second ever successful stamping mani! Yet again, a big shout out to Tracy Ball-Eriksson for sending me a stamper that works :-)

First off, let's see the mani:

In the shade :-)
Squeeeeeeeeeeee awesome stamping
with TURQUOISE and PURPLE!


This mani contains all my favourite colours, so I just couldn't stop staring! Turquoise AND purple together?! Heaven!


Here are the polishes I used:
  • Rimmel How Do You Lilac It (base)
  • Maybelline Turquoise Lagoon (gradient)
  • Barry M Gold Foil Effect (stamping)

I love a good sponging(!) and so I just had to show you the half-way point in this mani: my awesome turquoise to lilac gradient! Check it out:

Check out the gradient in the sunlight!
Don't mind the random brown spot - my sponge
had some purple left on it!


Pretty nifty, huh? :-) Finally, I'd like to share a couple swatches of the base colour with you (Lively Lilac):

Artificial light
Natural light (shade)

This is one of those Rimmel polishes that apply like a dream, just like Grey Matter. Having ascertained that my camera is a bit off when it comes to colours, I can tell you that this is a warm-toned pastel lilac creme that leans either purple or pink depending on the light (as I think you can see). This versatility is actually really fun because the tone of the purple changes throughout the day.

Pretty sunshine bonus pic :-D
Here you can really see the stamped image ^^


So what do you think of this, my second ever successful stamping attempt!? I'm really proud of this mani - I couldn't stop staring at my hands when I wore it and I was really sad to remove it :-)


What other funky colour combinations would you like to see combined with stamping? I have an entire set of plates to play with now - and I wanna use them!

'Til next time, curlettes :-)

Keep smiling!

- Skye x

Monday, 18 February 2013

NOTW: Stamping success!!!


Hello my lovelies! Welcome one and all :-)

I have something special to show you today. Not special because it's awesome (it's not), but special because it marks a major milestone in my nail art journey... today is the day that I show you that I conquered STAMPING!!! Woohoo!!! As such, this post is dedicated to Tracy Ball-Eriksson for all her encouragement and for sending me her double-ended Konad stamper all out of the kindness of her heart. Thank you so much for making this post possible Tracy :-)

Let's take a look at my efforts:
Sorry it's blurry :/ My camera can't cope with the new glossy TC.
Yaaaay go me! This is GA26 from the GALS Fairy box, which I'm really pleased I bought (genuinely jumped for joy when I saw what the postman brought me!). I've been struggling to stamp for about seven months now and I became very disillusioned... but then it hit me: it must be the plate. Sure enough, I successfully stamped the above image first time :-) Thrilled is the word!

Of course, then I had to go and ruin the mani. The colours I chose weren't a great combo anyway (I thought I was going to play and fail, not play and WIN!), but then I sorta made things worse :P

Don't believe me? I'll show you:

Hmmm...

Hmmm O.K., I'll give you that, it doesn't look so bad. Not thaaaaaat awful... but check out what I did next (ohhhhh why, oh why???):

Why, why, why?!
Oh well, at least the stamping looks awesome here!

Yep.... ew :-( I think I'll try to paint over the sparkle top coat later with the purple again lol. Oh well - we live and learn! :P

Edit: I actually ended up removing this later that night. I just couldn't take the ugly!!!

Here are the polishes I used for this (rather experimental) mani:
  • Rimmel Grey Matters (blue-grey base)
  • Catrice Copper Cabana (stamping)
  • Kiko #315 (purple)
  • Collection 2000 Sparkle Top Coat

Finally, as always, I'd like to show you the base colour for this mani:

This is a very versatile blueish grey with two coats of
HK Girl on top - very glossy!
This is Rimmel Grey Matter, a blueish grey with the PERFECT brush; I love applying this one because the brush makes it so easy! The polish is pictured here with two coats of HK Girl, which is very glossy, as you can see :-) What you can't see is the real tone of the grey... I realise it looks a bit green but I swear it is blue-grey! I tried editing the photo but made it worse (even less true to colour), so I decided to give up and show you the original. The problem with this is that my photos are obviously always slightly off-colour - it just shows up more here... I'll be monitoring the situation because it may explain why I always look so deathly pale, too! But back to the nails now :D


Sooooo... GO ME, right?! This mani is pretty fugly, but I learned not to do this colour combo again, and I learned that less is sometimes more ;-) Of course, I also learned that I CAN stamp :D I can't wait to get some more stamping polishes and play with my GALS set :D

What colours would YOU have chosen to go with Copper Cabana? Let me know in the comments!!!

'Til next time, curlettes ;-)

- Skye x

Monday, 4 February 2013

NOTW: Funky French half moons!

Hello and welcome to my blog ^^ I'd like to thank all of my new followers - it's nice to know people like what I'm doing :-)

Today I would like to show you yet another tape mani - my first ever attempt at a half-moon mani!!!! Here goes:

Hmmm my half moons look straight... but they aren't!

See! Proof they are curved :-)

I'm SO proud of this! I've been jealously eyeing half-moon manis for several months now and they have always intimidated me somehow... but since I'm on a tape-mani roll, I decided to take the plunge this week :-) I think I mostly did a really good job, although I initially tried to tape off my half moons with French tip stickers rather than hole reinforcers, which was a mistake (that's why my pointer looks a bit less awesome than the rest).

I can imagine this same mani in a ton of different colours, so choosing was hard... however, we ended up having lots of snow this week, so I decided to go for colours that would be really warm and bright against the rare Southern white-out :-)

Whilst we're on the subject of colours, I'd just like to draw your attention to the AMAZING shimmer in the purple polish:

Check out that gorgeous rainbow-blue shimmer! *.*


Polishes used:
  • Rimmel #270 Shocker (hot pink half moon)
  • Collection 2000 #6 Purple Rain (purple - complete with a gorgeous multicoloured shimmer)
To round out this post, I'd finally like to show you the base colour for this mani:

Sorry about pic quality: the polish is really glossy :S

This has previously been a surprise fav of mine, but it has now fallen out of favour because the formula on application this time was sucky. I'm beginning to realise this is perhaps a problem with Rimmel - the formula starts out as perfection, but eventually gets gloopier and hard work. My cuticle line is a bit messy because of this. I'm sure I'll be wearing it again, but maybe I'll invest in some thinner first! :-P


What's your favourite colour combo for funky half-moons??? Let me know in the comments!

'Til next time! 

- Skye x

Monday, 28 January 2013

NOTW: Geometric Tape Mani

Hi there :-) Welcome to my blog! I have picked up a veritable TON of new followers lately and I really can't believe it - I'm really grateful for each and every one of you :-) So make yourselves at home; grab a beanbag and enjoy :D

Today I have another tape mani to show you! This one gave me hell ~.~ First off, let's see my handiwork:

My thumb is pretty too!
Sadly I couldn't quite capture the silver-green-purple
flash of  the multichrome on camera :-(


This is REALLY pretty, but I will probably never do it again. Cutting the tape up into all the right shapes was making me tear my hair out - and getting everything symmetrical was such a headache! Call me lazy, but I never want to spend that much time with scotch tape EVER again. Also, the tape is now EVERYWHERE. Ugh. Of course, had I planned this mani properly, I would have applied the colours in reverse order, starting with the purple... and come to think of it, I bet it would have been a doddle with striping tape (which I don't own)... oh the gift of hindsight! ;-) At least I had pretty fingers (albeit just on the one hand...) :-)

Here's the polishes I used:

  • Essie Trophy Wife (teal base)
  • Barry M Silvery Lilac (strong silver multichrome - flashes purple and green)
  • Kiko #315 (purple)

This is quite a short post today - go me! All I have left to show you is a full swatch of the base colour, which is perhaps the perfect teal :-) Take a look:

Please ignore the imperfections - I managed to mess up application
big-time but the angle of the photo hides most of it :-P

Y'all don't know this, but this colour is my weakness. If it has turquoise/teal on it, I automatically love it, regardless of what it is. I just can't help myself! My go-to turquoise has always been Rimmel Green With Envy, which is a bit brighter than this Essie, but the formula is awful (much like that of my beloved Black Cherries). In fact, the polish makes me so ANGRY that I don't use it anymore - but now I have a replacement :D

This Essie polish was an untried (staining is my enemy) and is my first ever Essie colour :-) I love, love, love the colour and finish, and I quite like the brush, but I don't love it; I normally always look for a wide brush, but this brush is a bit too wide for my tiny pinkies. It's not a big deal, I guess; it just means I have to paint more carefully! :-P

EDIT: The wear-time on the Essie turned out to be poor! What a shame. On the plus side, no staining :-)


What do y'all think? I enjoyed this mani but would definitely not approach it in the same way again! I'm really enjoying my tape mani spree this month and I can't wait to show you my next mani - perhaps my favourite EVER so far! DON'T MISS IT!!! :-)

'Til next time, curlettes! :-)

- Skye x


Friday, 21 December 2012

Keeping it Simple: Festive Accent Nails

Hello lovelies! Welcome back to my blog. 

Today I have a very short post for you :-) This is Kiko 221 (Light Satin Beige) with a KBShimmer No Whine Left accent nail:

Keeping it simple!

I'm a bit sad because the picture doesn't capture the beauty of either polish, really; I'm sure that this mani would have looked more impressive in the sunshine, but all we have right now is rain *le sigh*. 

For the record, the Kiko polish is a sheer champagne glass fleck/shimmer polish, and this is about four coats. The polish is actually a favourite of mine, though it suits my summer fingers better. In the bottle it looks quite silvery, and even has subtle purple and green specks in it (you'll have to take my word for it!), but in artificial light it looks quite golden. 

No Whine Left is shown here in about three coats plus several layers of shiny top coat. I did think about putting KBShimmer We Three Blings over the Kiko to make this mani more Xmassy, but I was too frightened of the removal to attempt it and ruin my nails just before Xmas.

Speaking of removal...

Victory!

...I mastered the glue base coat! 

This time, the glue dried in about 5-10 mins and then I could get on with my life (yessssss!). I think the trick was not to apply lots of thick heavy coats, but to apply the one thick-ish coat, wait a few minutes for the water in the pva to evaporate, and then repaint only those areas around the edges of the nail that already had a super-thin layer of dried glue. I also didn't use my base coat over the glue like last time. 

The wear time was probably about 3 days (probably because I like hot showers) and the glitter popped right off my nail in one big sheet - I didn't even need my orange stick! My nails actually look really moisturised too. This is definitely a keeper :D I love that I'll now be able to use a main mani colour and then change my accent nail according to my mood ^^ 

Have you tried the glue method yet? And what do you think about these champagne shades? Yea or nay?

'Til next time and stay happy :-)

- Skye x


Friday, 7 December 2012

Max Factor Fantasy Fire

Why, hello! Welcome to my blog :-)

WARNING: seriously picture-heavy post (but it IS fantasy fire...)

Today I have a polish for you that truly needs no introduction (although I'm a tad verbose, so there'll be one anyway). The reason for my choice: a friend of mine at my local Clinique counter spotted it in my basket whilst I was in Boots the other day and told me I HAD to wear it next time I go in store so she can see what it's like on the nail. Her face when she saw the bottle was FULL Gollum! I wish I could have got a photo to put on this post, but I'm sure she'd have killed me for that ;-)

A crude artist's impression of my friend's face - with surprisingly little artistic licence!
(with thanks to Google and www.prettypurplepolish.com for the best bottle shot I could find)

I wanted to show my friend the polish in its best light, and spent a lot of time googling different undies to figure out which would be best, but in the end, I decided to take some inspiration from Liesl Gutierrez on the PAA FB group and swatched it alone in all it's glory. As we all know by now, this is a very sheer polish, and so I eventually decided to experiment with how many layers it would take to get full opacity. The magic number? Six (in most lights). A lot of people will be absolutely aghast that I 'wasted' that much of this tiny bottle of polish, but I can replace it any time because I honestly have it coming out of my ears here; clearly there aren't any polishaholics in my area!

This polish has so many different sides to it that I took about FIFTY (50) pictures of my nails before eventually narrowing them down to the following (so please don't be offended that there are six)! All of the swatches below were photographed WITHOUT a top coat - this polish is unbelievably glossy!

Enjoy :-)

Ooooo
Ahhh
(Slightly blurred) close up!
Multichrome goodness: enlarge to see the green!

The full spectrum under fluorescent lighting (sorry
for the quality - had to be quick whilst the Dr was gone)!
This is what six layers of FF looks like in natural light - BLUE!

I've had this polish in my collection for some months now (used once before), and if I'm honest, I don't love it as much as I'd like to - it's just not the same on the nail as it is in the bottle. That said, I'm happy to keep experimenting with different undies until I find the perfect combo.

What's your fav undie for this polish? Let me know in the comments!


[EDIT: Bonus nail art!] 

I wasn't going to show you this, or even do this(!) but I sat down last night to remove the mani and started playing around with my new Models Own nail art pens. I originally planned to try drawing a snowflake because I am just dying with jealousy with all these beautiful winter manis out there right now, but I ended up getting side-tracked and this is what I came up with:

Close-up: I did art!
Matte and multichrome!

I'm so pleased with how this came out. I was originally just going to draw the bow outline, but it actually looks better filled in and the silver had to be layered up a lot to get to that opacity. Also, isn't the matte Fantasy Fire pretty :D It truly lost nothing of the multichrome and I think I may actually prefer it matte! Finally: this mani was about a week old (WITHOUT a top coat!) - and check out the tip wear! In fact, I made the tip wear worse because I tend to chip off the polish on my tips if any flakes off, and I chipped off  LOTS. I'm pretty sure that this mani would have been indestructible with a top coat!

I realise that this post is both LONG and FULL of pics, but I hope you enjoyed it and will stick around to see what I come up with next :) Needless to say, my posts aren't normally this long!

Thanks for stopping by and 'til next time!

- Skye x